Centroid CNC control sales, service, training and support
The All-in-one DC unit, with either an M39 or M400 operator console, makes a clean and relatively simple upgrade for most earlier Centroid DC-servo control systems.
For M39S and M400S systems built since 2001, with SERVO3IO or DC3IO combined servo drive and PLC units, the installation is quite simple. The All-in-one DC unit has the same mounting footprint as the SERVO3IO and DC3IO. Only some of the wire and cable connections need to be moved or extended, and some additional terminal block space is needed to distribute 0VDC for PLC inputs.
For earlier M10, M40, M39 and M400 systems, with SERVO1 or QUADDRV drives and RTK2 PLC units, somewhat more work is required in the cabinet.
Revolution systems are similar to SERVO1/RTK2 M40 systems, but they typically have more space available in the cabinet. This can make it easier to lay out components, but also makes it more likely that wires and cables will need to be extended.
All of these upgrades make use of the original servo motors and encoders; the original transformers and servo power supply rectifier; and, except for M10 or M20 systems, the original emergency stop contactor.
For these controls, I typically put the All-in-one DC on the subpanel behind where the SERVO1 drive was originally located. I move the servo power rectifier lower, move the contactor rail if necessary, and install 1" standoffs a short distance above the old subpanel so that the All-in-one DC unit can be mounted a reasonable distance above the cabinet floor. I usually install a vertical DIN rail in place of the RTK2 unit, to hold the AC and DC distribution terminals and any necessary fuses.
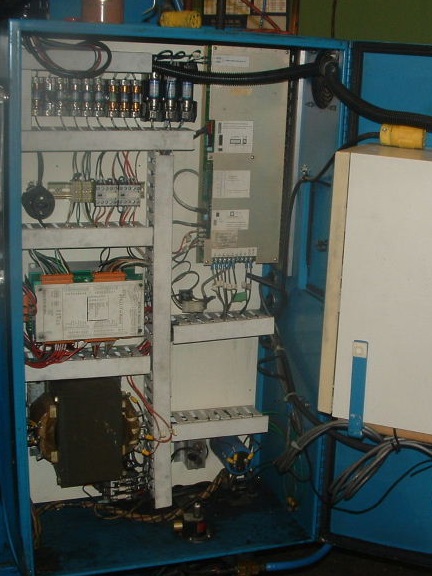
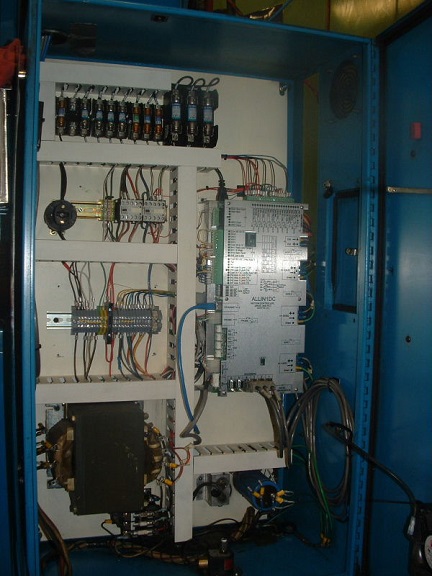
Below is the cabinet of a year 2000 M400 system, which I upgraded with a new M400 console and All-in-one DC control unit in August 2014.
| |
| 2000 4-axis M400, before upgrade | After 2014 upgrade with All-in-one DC |
When I moved the horizontal DIN rail holding the contactors a few inches left, I also moved it up so that the coolant contactor could be turned right-side up.
Some additional length was needed for the servo motor power cables. They originally connected to the bottom edge of the QUADDRV. In the new system they connect to the right edge of the All-in-one DC. Fortunately on this machine the original installer had left excess length coiled up outside the cabinet, so I was able to pull it inside. Otherwise it would have been necessary to run new cables to the motors. I did have to solder a longer power cable for the rotary fourth axis onto the back of the 4th axis MS connector assembly.
Below is the cabinet of a 1995 M20 system, which I upgraded with a new M400 console and All-in-one DC unit in October 2014.
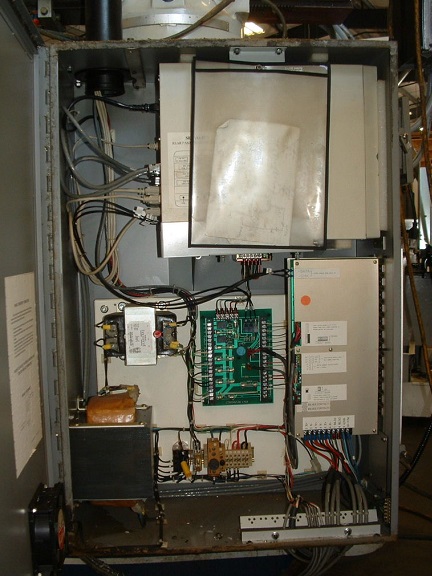 | 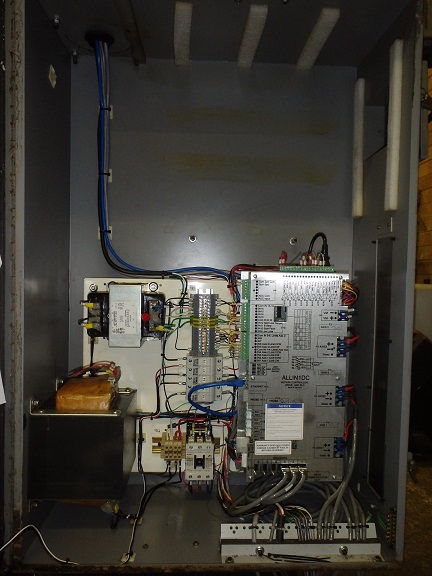 |
| 1995 M20, before upgrade | After 2014 upgrade with All-in-one DC |
The original M20 control has a mini-tower PC in the upper part of the cabinet. Because the M400 system has the PC built into the console, that space is left vacant. With that space it would be possible to move the spindle inverter (presently mounted in a separate enclosure) into the main cabinet, if desired.
The M20 used a light-duty emergency stop contactor with a 120VAC coil. For the upgrade control, I installed a heavier duty contactor (50A), with a 24VAC coil. I also moved the transformer fuses and servo supply fuse up to the vertical DIN rail.
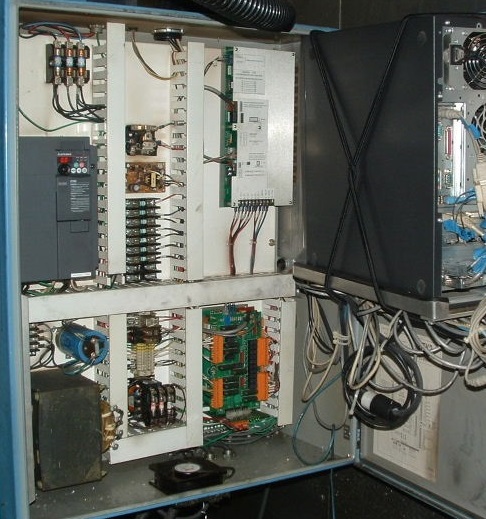
Below is the cabinet of a 1995 Revolution Minuteman III, which I converted to an All-in-one DC M39 system in August of 2013.
 |  |
| 1995 Revolution, before upgrade | After 2013 upgrade with All-in-one DC |
For the console, we used an M39 pendant and an Asus all-in-one PC. As with an M400, having the all-in-one computer on the console arm eliminates the need to fit the computer inside the cabinet.
This machine has the spindle inverter mounted on the back of the column, so it too did not require space in the cabinet. Had I needed to accommodate an inverter, I probably would have relocated the main fuses (larger fuses, on the right); mounted the All-in-one DC unit 8" higher; and put the inverter below the All-in-one DC.
Many of the input and output wires, which previously went to the RTK2 unit, were not long enough to reach the I/O terminals of the All-in-one DC unit. Instead I landed them on the DIN terminals where the RTK2 had been, then ran extensions from there to the All-in-one DC.
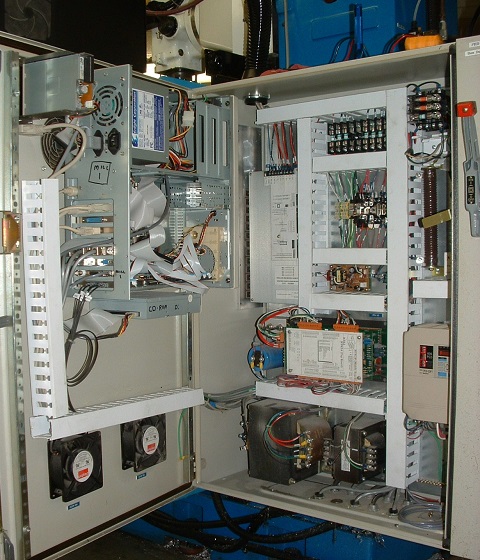
Below is the cabinet of a 1999 Revolution Minuteman III, which I converted to an All-in-one DC control in October of 2013.
 |  |
| 1999 Revolution, before upgrade | After 2013 upgrade with All-in-one DC |
In this case, we kept the original Revolution operator console, but added an M39 jog pendant to replace the original jog panel. We installed a compact Dell desktop computer on the cabinet door, approximtely where the original computer had been located. Since MPU11 and All-in-one DC systems no longer require an expansion card (e.g. CPU7 or CPU10) inside the PC, it is possible to use a much smaller computer.
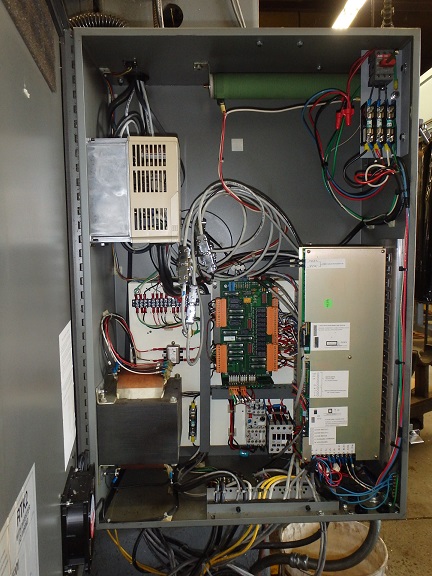
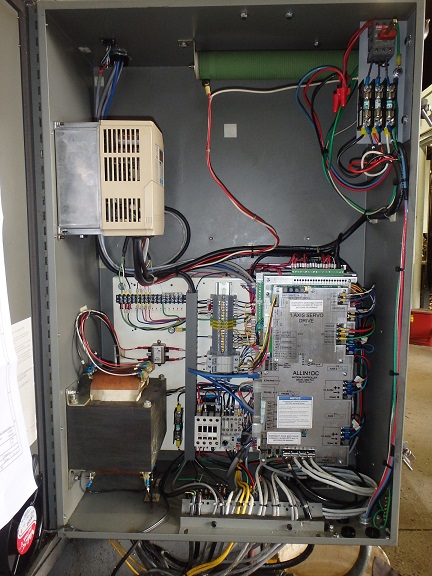
Below is a 1998 Revolution, with the later-style cabinet layout: SERVO1 drive upside down in the upper left; contactors and AC distribution in the center; RTK2 lower left.
 |  |
| 1998 Revolution, before upgrade | After 2015 upgrade with All-in-one DC |
This one required a little more work in the cabinet. I relocated the main fuses, AC distribution and coolant relay to the left edge; put the E-stop contactor next to the servo power capacitor; and again put the DC distribution and I/O junction where the RTK2 used to be. That cleared the upper center space for the All-in-one DC unit.
This was an M400 installation, so there was no need to accommodate the PC inside the control cabinet. For an M39, it would be possible to put the new control PC inside the cabinet door, where the old one had been.
Standard features of the control software include:
Software options purchased for the original kit are transferred to the new control unit upon return of the original CPU7 or CPU10 board.
All applicable Centroid options and accessories are also available as add-ons for the new unit.
Copyright © 2015 Marc Leonard
Last updated 20-Nov-2015 MBL
![]()